Monday, March 31, 2014

The Master Suite by Fiorito Interior Design, Part Three

I am proud to present finished photos of a Master Suite project I started in the fall of 2012. While it was under construction, I wrote about it here and here, showing structural photos and installation progress: take a look to catch up and see the fascinating evolution of the space.

This project was not a simple cosmetic facelift or even a down-to-the-studs gut job. This was a full-on extension/addition that required me to work closely with the contractor and architect. The back portion of half of my clients' home was blown out to make way for a much larger master bedroom and bathroom. And all the disruption, construction, and wait was well worth it.

But before we ogle the reveal images, let's take a look at what the space looked like when I initially encountered it. You will see why my clients were eager to be rid of what they (and I) considered to be a very un-masterful master bathroom.

Like many California ranch homes built in the 1950s, this master bathroom was not really a "master bath." The concept of a "master bath" as we know it today didn't really exist then. My clients, who only three years ago purchased the home from the family of the original owner, were saddled with a small, dysfunctional space. Chief among the dysfunctions: a vanity only 30" high (my clients had to stoop quite low to lean on the counter), and an inconveniently placed window that forced the too-low vanity mirror to reflect only the waist and partial torso--not the face--of anyone standing in front of it.


A separate water closet with a pocket door was also the spot for a very narrow shower. That, my friends, was a master bathroom in 1956. And so my work began.


In order to refine a design concept for the soon-to-be larger space, and thereby narrow down material choices, my clients and I had a brainstorming session: we spoke of an elegant Old World/ European bedroom and bathroom, a luxurious bath that would reference a Roman spa, and finally the idea of a Hammam was brought into the mix. We blended these ideas together in oil-rubbed bronze fixtures, and a tiny mosaic vine pattern in beautiful Bursa Beige marble from Turkey and white Thassos marble from Greece. The extension of the house allowed us to create a true master suite which includes a greatly enlarged bedroom area, and a generous sized bathroom with a jetted soaking tub, a very large walk-in shower, a double-sided fireplace (facing the tub on the bath side), and a luxurious 8' long vanity with double sinks and a storage tower.

The vanity wall is covered with the imported mosaic vine pattern. The custom Larson Juhl framed mirrors are flanked by gorgeous hand-wrought scones from Hubbardton Forge which echo the vine and leaf pattern in the mosaic. And the vanity itself features an  LED strip in the toe-kick which allows my clients to see in the middle of the night without having to turn on a shockingly bright overhead fixture.

Photo by Bernardo Grijalva


At the other end of the master bath, a luxurious jetted tub nestles by a fireplace in the bay window area. Views of the garden can be seen while soaking in bubbles...

Photo by Bernardo Grijalva

Photo by Bernardo Grijalva

The over-sized walk-in shower features a paneled wainscoting effect which I designed to be executed in Crema Marfil marble. The vine mosaic continues in the shower, topped by green onyx squares. A rainshower head and a hand-held spray on a bar provides showering options. The shower floor slopes gently in one direction toward a hidden linear drain; this allows the floor to be read as a continuation of the main space, without being interrupted by a center drain.

Photo by Bernardo Grijalva


I have a few more finished projects coming up which I will be sharing with you soon. New posts are always scheduled every Monday!

In the meantime, happy designing!

Monday, March 24, 2014

Things Are Looking Up! Three Types of Ceilings

Ceilings are often the last thing anyone thinks of, since they hover almost outside of our peripheral vision and can effectively be ignored. Our focus is usually what is closest to us: the objects around and under us. But ceilings afford a great opportunity to introduce a special design element that can actually become the focal point of a space.

A common ceiling element is the tray ceiling. This feature is comprised of a shape--it can be an oval, a square, a rectangle, even an octagon--inset into the ceiling plane, above the ceiling line. Often a soffit or slim hidden space is built in to camouflage a light source. When the light is on a dimmer, it provides a marvelous option, because the light can then serve as ambient or decorative lighting. And as we can see from the image below, if you have a tray ceiling installed, you will want to highlight it with paint, a pattern, a different material like wood, or perhaps even gold or silver leaf (which would bounce more cool or warm light onto the room below).

http://browndavis.com/
http://www.josehart.com/portfolio.html
http://www.prizantdesign.com/
http://cabanacasa.com/

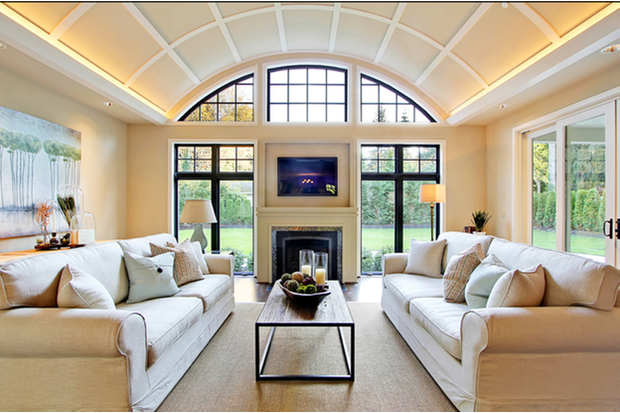
Another popular ceiling style is the barrel ceiling. You can see why it is called a barrel ceiling since, when viewed from below, it appears as if one is inside a curved barrel! As with a tray ceiling, it only makes sense to highlight this great and unusual ceiling shape with paint, metallic leaf, different materials, or moulding. And just like a tray ceiling, lights can be hidden in a soffit around the edge of a barrel ceiling to draw attention and to introduce a flattering indirect source of light.

http://www.csikitchenandbath.com/portfolio/bath/index.html
http://andreabraundstaging.com/
http://www.srgambrel.com/

Our third ceiling style is called a coffered ceiling, and has been in use since the Romans, but now we generally associate this look with Elizabethan or Jacobean interiors. There is something about a coffered ceiling that can be very Old World and evoke England, or even Italy or France. I must take a moment here though to address a misnomer: I have heard, and seen in writing, people refer to this ceiling as a "Crawford" ceiling. That is a mishearing--or mondegreen, if you will--of the word "coffered" which means "to be composed of boxes." When people speak of what is in the coffers, meaning how much cash they have, they refer historically to a locked and heavy, solid wood chest where people used to keep valuables or money. The point of this ceiling is that the cross beams create boxes or "coffers" in which a decorative element or even a painted panel may be inserted. There is no such thing as a "Crawford" ceiling.

http://wandrdesign.com/
http://www.paulmoondesign.com/

Generally speaking, a tray ceiling is a good option for standard height ceilings (eight feet is a standard ceiling height) since it will extend the feeling of the room upward, making the room seem taller. A barrel ceiling will achieve similar results. As you can imagine, a tray or barrel ceiling requires actual construction since your ceiling must be opened up. Coffered ceilings on the other hand are best if you have a higher ceiling line to begin with... something around nine or up to twelve feet. And this option does not require any true construction since the elements are installed outside of the ceiling (unless you want wiring in or lights on the beams, which could require some minor holes in the ceiling). There are so many more ceiling designs and fantastic materials that can be used to create beautiful, beguiling ceilings... I'll be covering them in future posts so stay tuned!

Happy designing!

Monday, March 17, 2014

Spring Equinox 2014

In honor of the Spring Equinox on March 20th, here are some ways to bring spring into your home:

Florals...

http://www.palandsmith.com/

...pink...


...blue...

http://www.katieridder.com/
http://tiffanyeastmaninteriors.com/

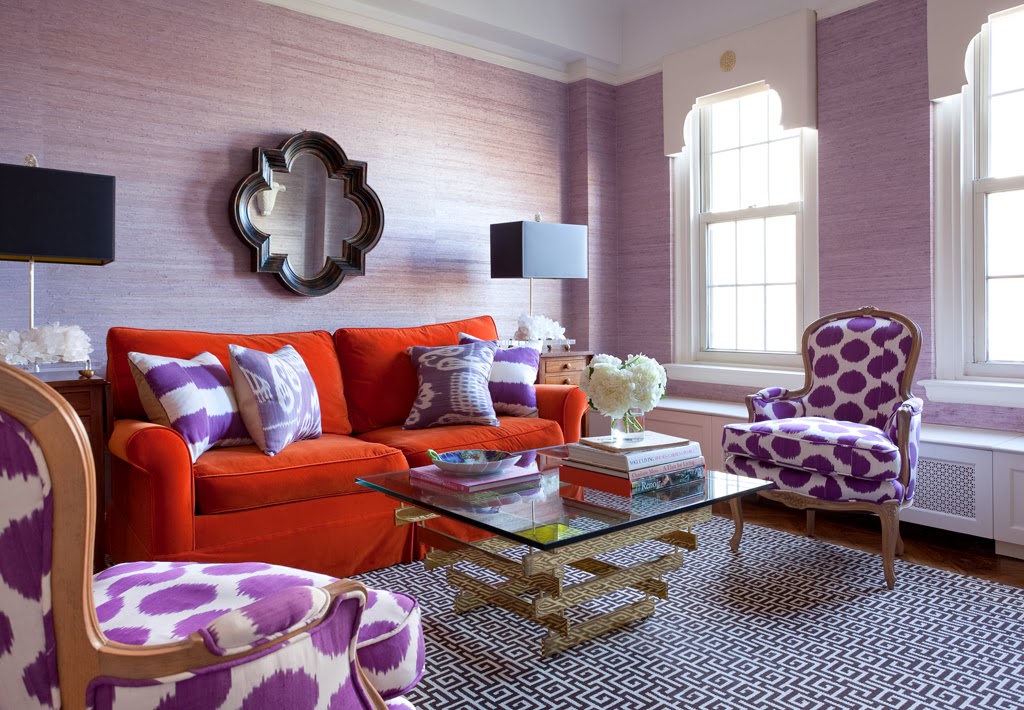
...lavender...

http://www.degournay.com/index.php
http://www.lillybunn.com/
http://www.jessicalagrange.com/

...green...

http://madcapcottage.com/
http://frankroop.com/

...and bunnies and bird nests.

http://www.bubkevitz.de/

Happy Spring and happy designing!

Monday, March 10, 2014

The Future of Lighting: LED

I have great news: the compact fluorescent is DEAD! And good riddance.

Now more than ever, it is important to choose lighting options that save not only energy but money. And LED lights fit that bill. They are not only the wave of the future, they are the wave of the present! In fact, a recent study by the Department of Energy examined all the steps needed to fabricate, ship, operate, and dispose of LEDs, compact fluorescent lights (CFLs), and traditional incandescent lighting, and the clear winner was the LED! When toxicity, ecosystem damage, climate change, and ozone depletion concerns were factored in, LEDs were far ahead of the other two options.

LED stands for Light Emitting Diode and uses an effect called electroluminescence to generate light. They use electricity and electrons so there is no filament to burn out. For many years, LEDs were only seen in tiny applications like indicator lamps, and in seven-segment displays like digital clocks. But in the last decade or more have we seen LEDs become a viable alternative replacement for incandescent bulbs and the dreadful fluorescent light.

With the phasing out of the standard incandescent A bulb (which is the classic "screw in" light bulb with a wide base used in all of our table lamps, and ceiling and wall fixtures) in watts ranging from 100 to 40, the LED industry has stepped up to provide us with some choices that for all intents and purposes act, look, and perform exactly like incandescent lights. Take a look below at the chart I made to illustrate the differences between incandescent, fluorescent, and LED lighting.


You can see that LEDs last longer (MUCH longer!), are more energy and cost efficient, and are safer to use (no glass to break) and safer for the environment (no toxic hazardous gases or toxic mercury). When looking at the lighting choices of the chart above, we must keep in mind that incandescent bulbs are being taken away, so they are off the table. That leaves fluorescent or LED. It is just ridiculous that the fluorescent industry thinks we should be using a product that forces us to leave the room for 15 minutes if a fluorescent bulb breaks, not to mention the fact that disposal requires haz-mat handling! Why would anyone subject themselves to those dangerous conditions and suffer with ugly, chalky light to boot? LEDs are really the only choice!

My early concern with LEDs was with the color rendering and Kelvin temperature. They tended to have poor color rendering (which is a way of measuring the true color of an object seen in a chosen light), and they tended to be a bit on the bluish side. The Kelvin chart below shows how the temperature of light dictates its color.


In order to appear most like an incandescent, you want to find a bulb that will burn at between 2400 and 3000 Kelvin... that will be a light that is warm, comforting, and familiar, like an incandescent. As you see on the chart, the higher the temperature, the bluer the light, until you end up with the blue-white clinical light of halide which is what you see in the enormous overhead fixtures in places like Costco or Sam's Club... or the evil fluorescent. But now, LED bulbs have come a very long way and behave exactly as an incandescent bulb! They come in every shape and in every wattage, like incandescents.

Many companies make LED bulbs but not all are the same quality. Not all have as long of a life as the major brands or reputable manufacturers. And not all are dimmable--a very important factor (make sure you read the packaging)! Companies like Green Creative located here in Northern California are making a wonderful variety of LED bulbs with excellent color rendering.


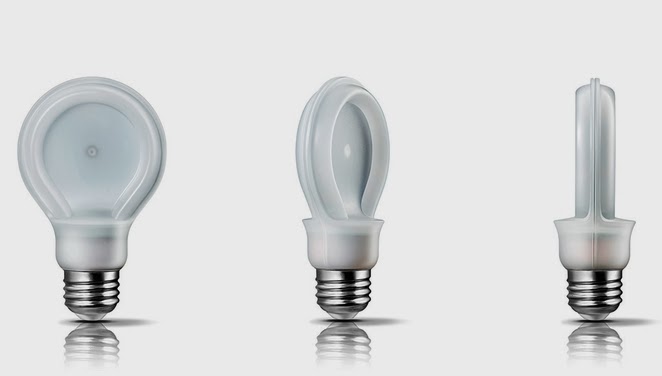
Advances are being made all the time and Philips just introduced a flat LED bulb that mimics a standard incandescent A bulb but with the energy and money savings we have come to expect from an LED...and with excellent color rendering.

http://www.usa.philips.com/c-p/046677433154/led-10.5w-60w-medium-base-e26-daylight-dimmable

LED bulbs can still be a bit pricey but with the gradual disappearance of 40-100 watt incandescents, and with a projected doubling of revenue for LEDs this year alone, we can expect prices to drop to close to what a regular incandescent bulb would cost. And by 2017, LEDs are expected to be 70 percent more efficient than even today’s CFLs! If you haven't yet, buy a single bulb to replace an incandescent in your home--you won't really be able to tell the difference. I bet you will be replacing all of your bulbs in no time.

Happy designing!