Monday, February 18, 2019

The History of Furniture: Windsor

For this installation of The History of Furniture, let's look at a style of furniture that is such a part of our lives and the history of not only England but the United States as well, that we sometimes overlook this workhorse piece of furniture.

The Windsor chair is a classic piece of furniture that first appeared in the 16th century. The woodworking technique of steam bending in the 18th century allowed the advancement of rounded pieces of wood and these Windsor chairs were made in Windsor, Berkshire and shipped to London for sale. English settlers introduced the Windsor chair to North America, with the earliest known chairs being imported by Patrick Gordon who became lieutenant governor of Pennsylvania in 1726

Below we have what I think of as the classic version of this classic style. The host chair at this table is what is known as a "sack back" Windsor chair...the rounded top dies into a chair arm...while the guest chairs are known as a "hoop back" or "bow back" style.


Here is another room by Kate Maloney which utilizes the "sack back" and "bow back" chairs. The space references traditional design, supported by the chairs of course, but there is something light and breezy and even contemporary about the feel of this room.


As we can see by the chart below, there are several variations of Windsor chairs that were made in Europe and the United States.


The chair in the photo below is called a "comb back" Windsor chair, and I think we can see why. The piece that dies into the arm does indeed look like a hair comb!


Now we come to a simpler design of a Windsor chair with a continuous arm. Instead of the hoop or bow coming down to meet the seat, it curls up into arms.


And lest you think that the only things "Windsor" are chairs, there were also Windsor settees. The concept was to put two or more chairs together to make a longer seat deck.


Happy designing!

Monday, February 4, 2019

Fiorito Interior Design Press Update, February 2019

I am proud to announce that Fiorito Interior Design has once again won a 2019 Best of Houzz Award for service from Houzz, the leading platform for home remodeling and design.


I am grateful to have been chosen by the more than 40 million monthly unique users that comprise the Houzz community from among more than one million active home building, remodeling and design industry professionals.

"Best of Houzz is a true badge of honor as it is awarded by our community of homeowners, those who are hiring design, remodeling and other home improvement professionals for their projects," said Liza Hausman, vice president of Industry Marketing for Houzz. "We are excited to celebrate the 2019 winners chosen by our community as their favorites for home design and customer experience, and to highlight those winners on the Houzz website and app."

But I am most grateful to my clients--past and present--who allow me to come into their homes and trust me to partner with them in shaping their surroundings and their personal lives. Thank you so much! I look forward to creating a lot of wonderful work with all of you in 2019!

Happy designing!

Monday, January 21, 2019

Legends of Design: Philippe Starck

We've looked at a few designers from the past but for our continuing Legends of Design series, let's look at a living legend: Philippe Starck.


A man of many talents, Starck's career has bounced around the design world, from commercial (restaurants and hotels) to residential to product design to architecture--even naval design. He started his career in 1969. He was named artistic director of Pierre Cardin's publishing house, he opened his own industrial design company Starck Product, and in 1983, he designed the private rooms of President François Mitterrand at the Élysée Palace in Paris.

With former Studio 54 owner and hotelier extraordinaire Ian Schrager, Starck pioneered the idea of the boutique hotel by creating The Royalton in New York City, where guests checking in had to traverse a veritable fashion runway of blue carpet to reach the reception desk at the far end...


...and a very unique men's room with a stainless steel waterfall urinal, a pedal-operated, round communal sink in the middle of the space, and hidden stall doors. When I visited The Royalton in the early 90s, just a few years after it opened, it was quite the hot spot, and I can indeed attest to the uniqueness of the rest room--it seemed like something out of a science fiction film with nothing resembling what I knew of as a men's room.


Starck went on to design a slew of unique hotels, each a true work of art. Just look at his work in the lobby of The Paramount: a checkerboard rug upon which is arranged, like game pieces, a collection of designer seating that includes sofas by Jean-Michel Frank, upholstered chairs by Marco Zanuso, a wooden chair by Antoni Gaudi and Marc Newson’s chaise lounge. A grand staircase to the mezzanine level is backed with a canted wall covered in silver leaf.


One of my favorite hotel spaces Starck created is the wildly imaginative bar at The Hudson. The lighted floor and Louis XVI furniture deliberately recalls the final set where Dave Bowman ages in Kubrick's masterpiece "2001: A Space Odyssey." I especially love the log bench with chair backs attached to the top.


Starck also worked successfully in the world of product design. In addition to mineral-water bottles for Glacier, watches for Fossil, and luggage for Samsonite, he created the iconic Juicy Salif citrus squeezer (it looks like an alien pod from "War of the Worlds") for Italian houseware brand Alessi.


But I think Starck is best known for designing hundreds and hundreds of pieces of furniture and lighting, and the best known of those pieces must be the Louis Ghost chair for Kartell. The classic incarnation is clear acrylic but it also comes in tinted colors and opaque black as well.


Happy designing!

Wednesday, January 9, 2019

SALE! Alternatives by Burton James

From now until the end of this month, you can save an additional 20% off my already discounted trade pricing when you purchase an upholstered piece from the Alternatives series by Burton James, a company who has been creating quality, bench-made upholstered furniture for over three decades.


The Alternatives series is one of my best selling options for sofas and sectionals. With thousands of fabrics to choose from as well as the combination of myriad details below, we can create custom pieces like no other.

Choose from:
* 10 arm options
* 4 back shape options
* 5 base options
* 9 leg options
* 7 nail head options
* 10 Standard wood finish options
* 6 Premium wood finish options

If you've been wanting to buy new upholstered pieces for your home, now is a great opportunity to save. Call or email to get started--visit my website for contact information!
This sale is for a limited time only! Orders must be paid for and placed by 5 PM, January 31, 2019.

Happy designing!

Monday, January 7, 2019

Engaging Entries, Part 7

Since we are "entering" a new year, it seems like a good time to check in on our ongoing series of "entries" and foyers...


Happy designing and Happy New Year!

Monday, December 31, 2018

Happy New Year's Eve! Welcome 2019!


Happy New Year to all my followers and regular readers. May 2019 be a healing, peaceful, and prosperous year for the planet.

See you next week for the first post of 2019. Until then, Happy Designing!

Monday, December 24, 2018

Happy Winter Solstice and Happy Holidays 2018!

It's Christmas Eve and I want to wish all my followers and regular readers a Happy Solstice--the shortest day and longest night of the year was 3 days ago--and Happy Holidays!

Monday, December 17, 2018

Holiday Inspiration 2018

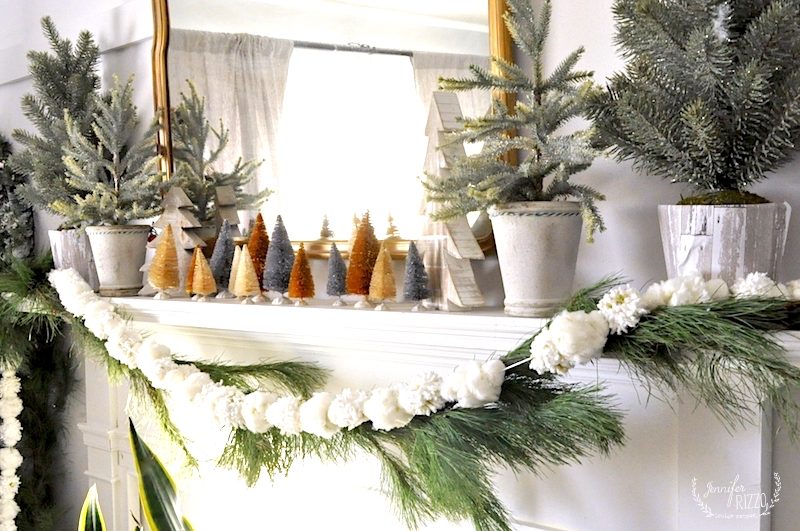
If you haven't decked your halls yet, there is still time! Here are some inspirational images to motivate you to bring the season into your home.


Happy designing and Happy Holidays!

Monday, December 10, 2018

After Demo, Then What?

If you've never had a remodel or renovation in your home, the steps can be a little vague. Often I find it valuable to let clients know what they can expect in terms of work and, consequentially, how long it all takes.

Let's start with a simple remodel of a space. Nearly all of my projects consist of "going down to the studs" as it is called in the industry. This step is referred to as "demo," as in demolition...it is when all the elements of your old space are removed and demolished, often in a delightful flurry of sledge hammers and crow bars, to create a blank slate and make way for your new space! However, if I am dealing with new construction, that leads to the same result: the studs.

And this is where we start this phase of the journey. Studs are what make up the framing of a room. A residential room is typically framed with 2" x 4" or 2" x 6" pieces of wood spaced 16" apart, on their center lines. These pieces of wood are the studs.

Below is a photo of a master bathroom suite I designed. The 2" x 4" framing you see is outlining what will become a new bathroom and master closet.


But here is where things can get a little vague. Mostly of my clients know that the next step is for the walls to go up and then they assume it is done. But there are many time consuming steps in between, performed by skilled, master craftsmen, to achieve walls that are ready to be painted.

The first step is to put up the drywall. This is generally a gypsum board product in a sheet form with paper on the back and front. They typically come in 4' widths with a length ranging between 8' and 16'. The drywall is affixed--normally in a horizontal orientation--to the wood studs and held in place with drywall screws.


Once this is done, the next step is to apply drywall compound (a thick, plaster-y substance sometimes called joint compound or, euphemistically, "mud") to all joints (where two pieces of drywall come together) and over the heads of the drywall screws. Sometimes this is done by a different team. I have seen drywall installers come to affix the drywall only and then pass these next steps to plasterers.


Then over all the joints comes a material called drywall tape. This joint tape gets embedded into the joint compound itself using a trowel blade so the finish is smooth.

This is left to dry for 24 hours.


A 2nd coat of mud is applied on all taped joints and this is left to dry for yet another 24 hours!

Next comes a sanding to knock down all uneven spots or areas where there might be some excess mud. It should look something like the photo below.

Steven Puetzer/Photographer's Choice/Getty Images

The 3rd and final coat of joint compound is often called a skim coat. A smooth skim coat is almost universally desired but it is possible at this point to do what is called a "knockdown" coat which consists of giving the mud a texture. There are many textures with many names. You may have heard people talk about a "popcorn" ceiling, a kind of ceiling finish (usually containing asbestos!) that was popular in the 70s and 80s with a very bumpy surface resembling a layer of popcorn or millions of tiny stalactites. That is an extreme example (it was generally sprayed on instead of applying by a trowel), but there is also "orange peel" texture, a wall version of the popcorn ceiling. And one of the more subtle textures is called a skip trowel texture. While there will still be a few low peaks here and there, it is not as offensive as orange peel or popcorn. But in this day and age, a smooth finish is what everyone agrees looks best.

After the skim coat is applied it must--you guessed it--dry for another 24 hours. You can see how this process takes time and patience. Once a client sees the steps necessary, they have a newfound respect for their home!
To prepare the walls for painting, they are given a final sanding, and are then wiped down with a sponge to remove all the loose dust. Now the wall is ready for a drywall primer. Why a drywall primer? Haven't we reached the end of what could possibly be put on the walls? Well, the drywall primer is made of a PVA or shellac/alcohol-based primer and is applied to seal the porous drywall and joint compound. When you or your painter comes to apply paint, whether latex or water-based, the drywall primer will prevent the paint from soaking into your drywall and joint compound.

It's quite a process...one that surprises those unfamiliar with construction. But your home is important. Think of it as protecting the integrity of your investment as well as enriching the quality of your life within it.

Happy designing!